Case Study: Healthcare collective MVP UI
- • Project Title: Healthcare Collective MVP UI
- • Expectations and outputs: High Fidelity Mockups and appropriate assets to build front-end design in React and bootstrap
- • Design and Communication tool: Figma
- • Client: HCCIP Pty Ltd
- • Date: Dec 2019
Hi 👋 I would like to share the product design case study of the Healthcare collective. Actually, I did this project 3 years ago before I left for maternity leave. I wrote this article to remind myself of how I processed the design work with the developer and the client 😅. It’s a commercial project, therefore there is certain information I couldn’t share but this article shares the general process of my design delivery.
A little about the client
Healthcare collective supports all Australians via telehealth services and access via various regional hospitals. They requested to make an application for specialist doctors to record their patient’s information.
Step 1. Understanding client’s needs
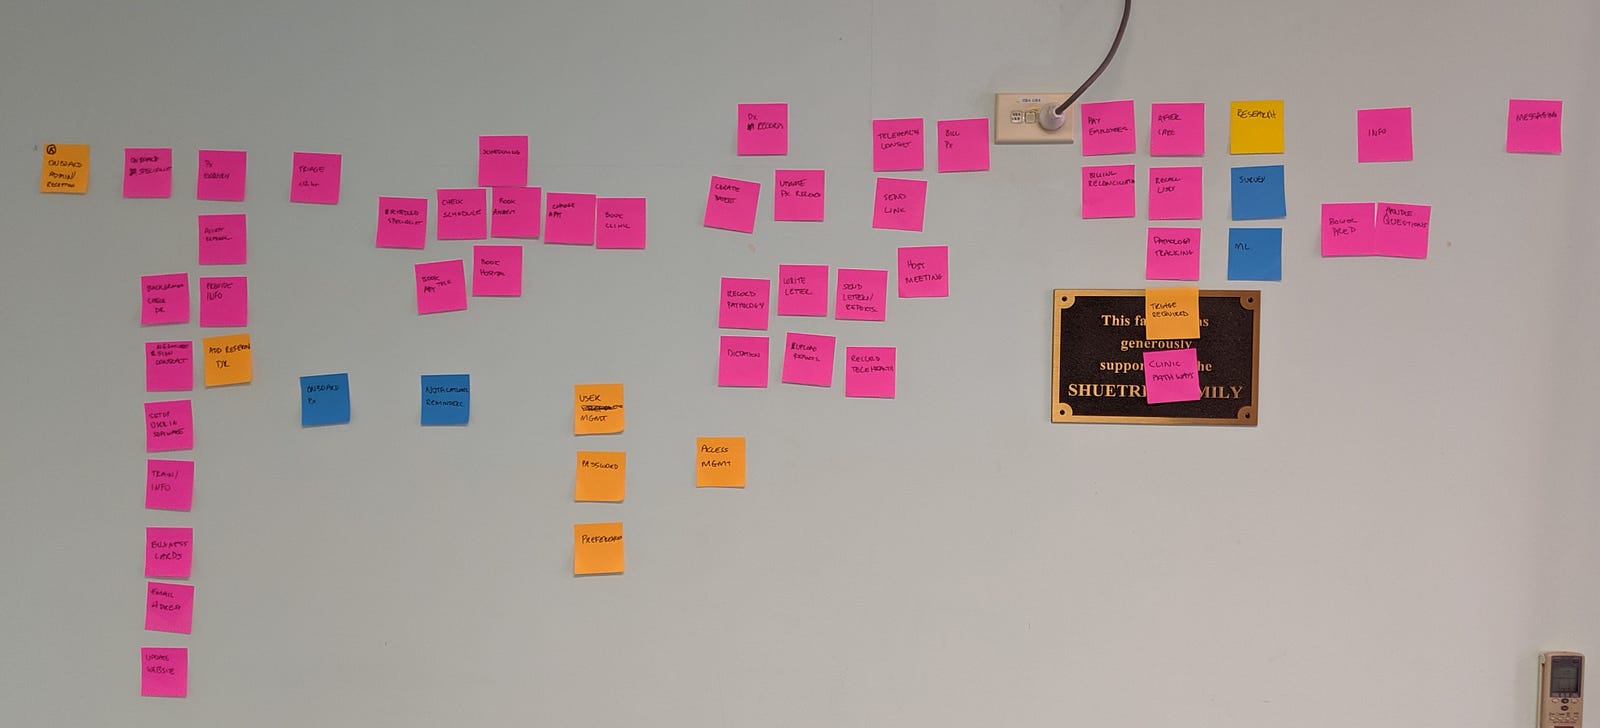
Requirements
- • Spent more time doing high-skill medicine
- • Being remunerated for that effort not managing admin, or menial tasks.
- • Ability to progress the frontier of what is best practice in medicine.
- • Flexibility in where they spend their time
- • Sole trader and pays too much for running his practice administratively (35%)
- • Reduced wait times to get an appointment and at appointments
Clients and I discussed user workflow like the below image.
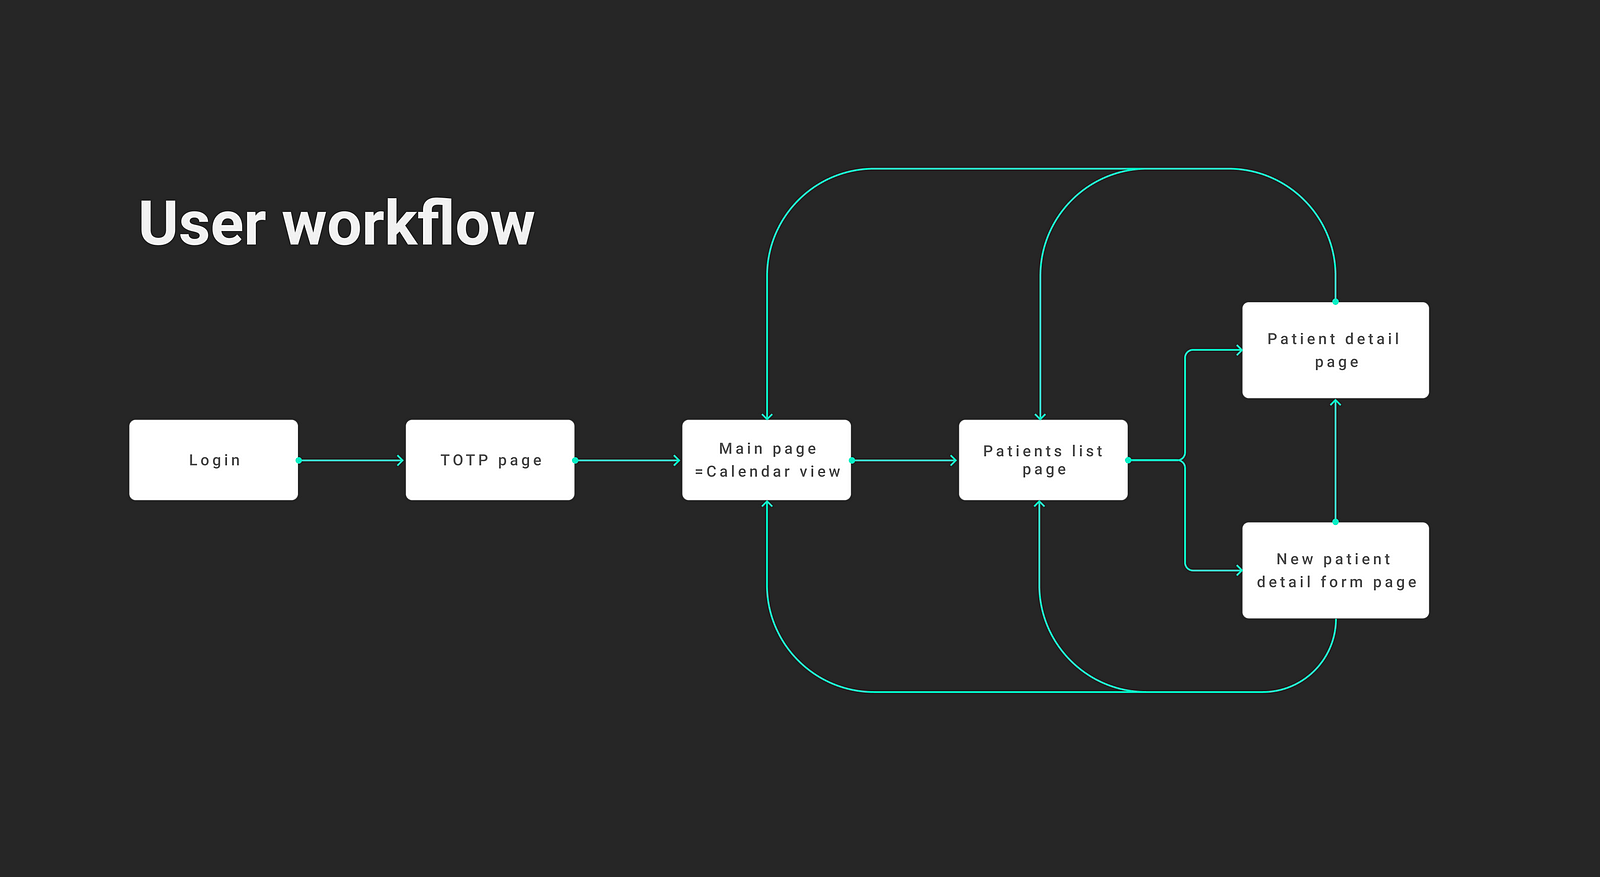
There are 6 steps in user workflow so we decided to make 6 pages.
- • Login page
- • TOTP page
- • Main/Calendar page
- • Patient list page
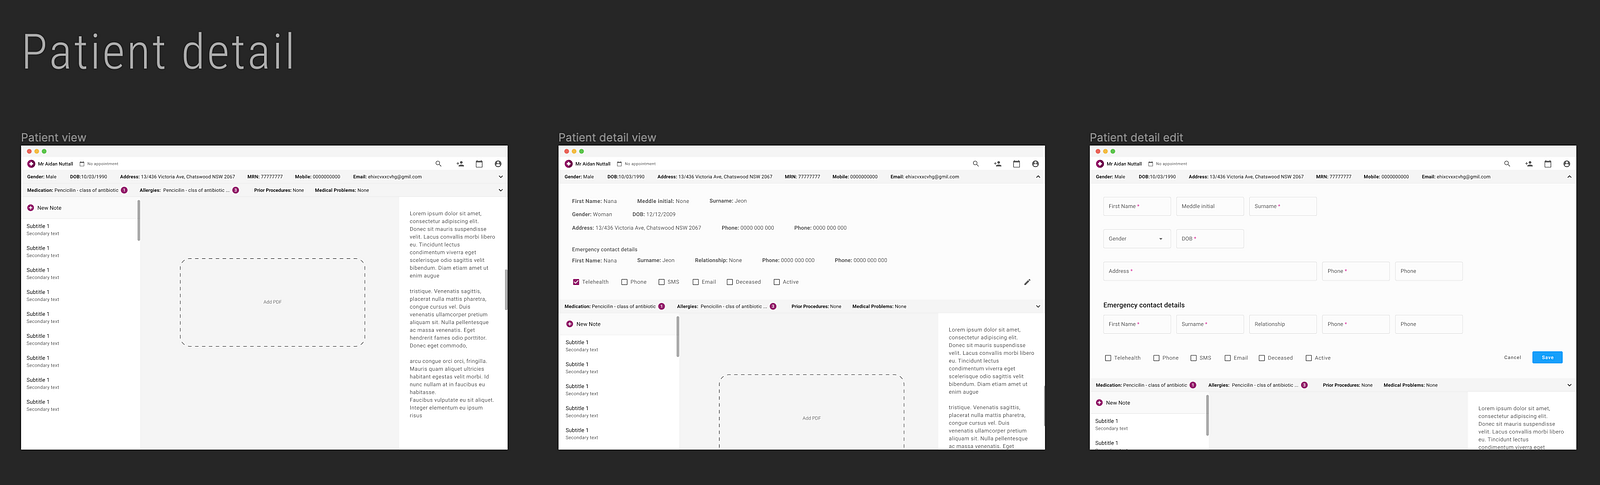
- • Patient detail page
- • New patient detail form page
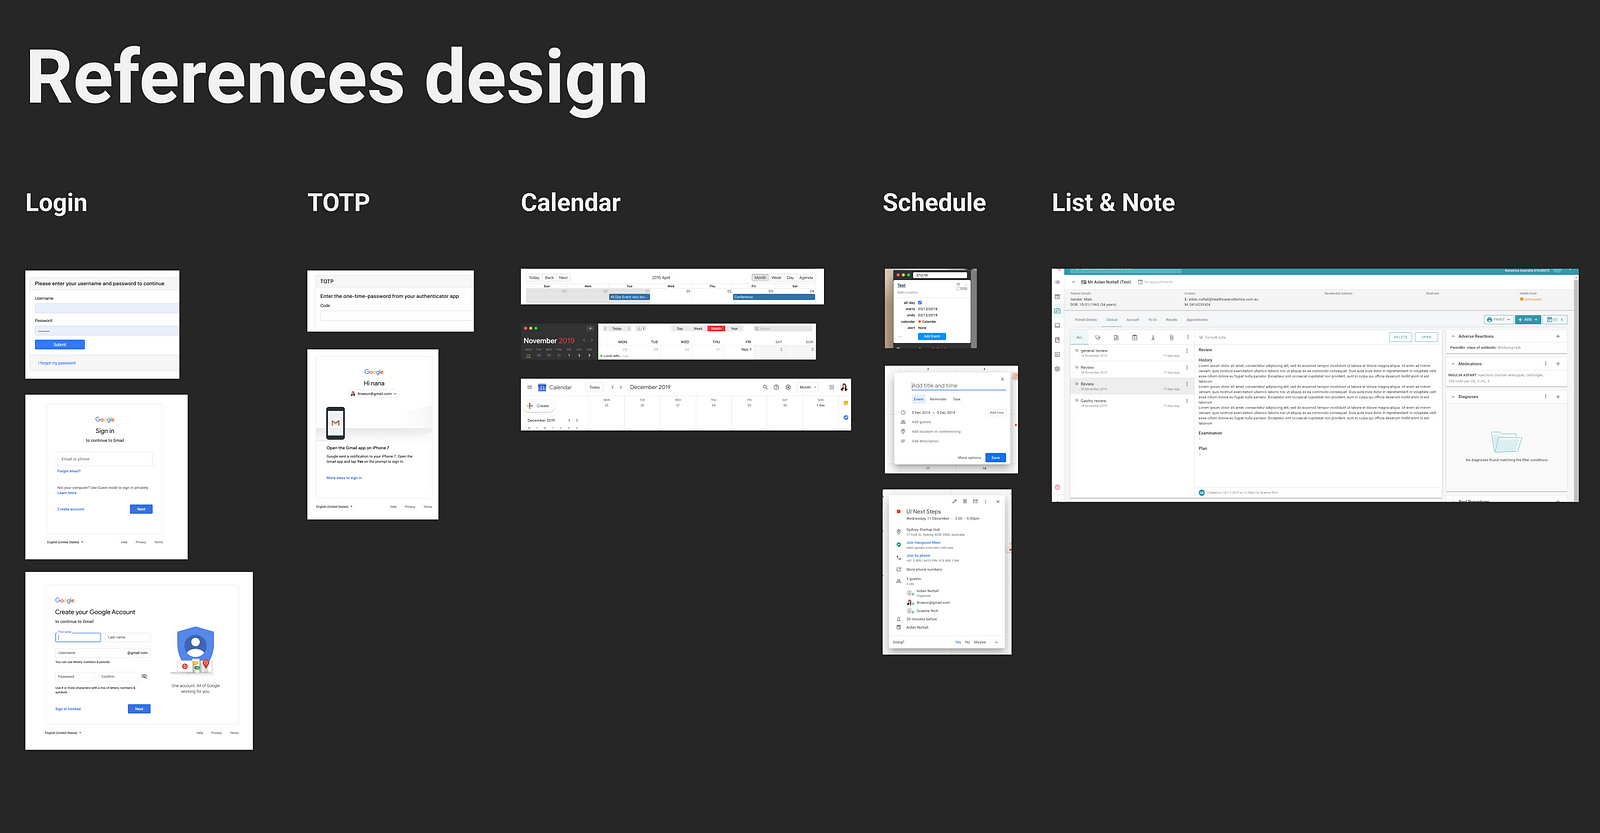
Step 2. Research references
I was given 5 days to complete the design work from user workflow to high-fidelity prototype. For this short timeframe, I discussed with the team (the project manager and the engineer) about adapting the UI design from Material Design which provides the best practice of user interface design backed by open-source code.
Step 3. Low fidelity prototype
Based on the Material Design, I quickly designed a low-fidelity prototype. And then I invited the team from the client side and received feedback on Figma in real-time. Collaborating in real-time collaboration with the client was extremely helpful with prompt feedback. Especially we discussed a lot about the features of handling medical data.
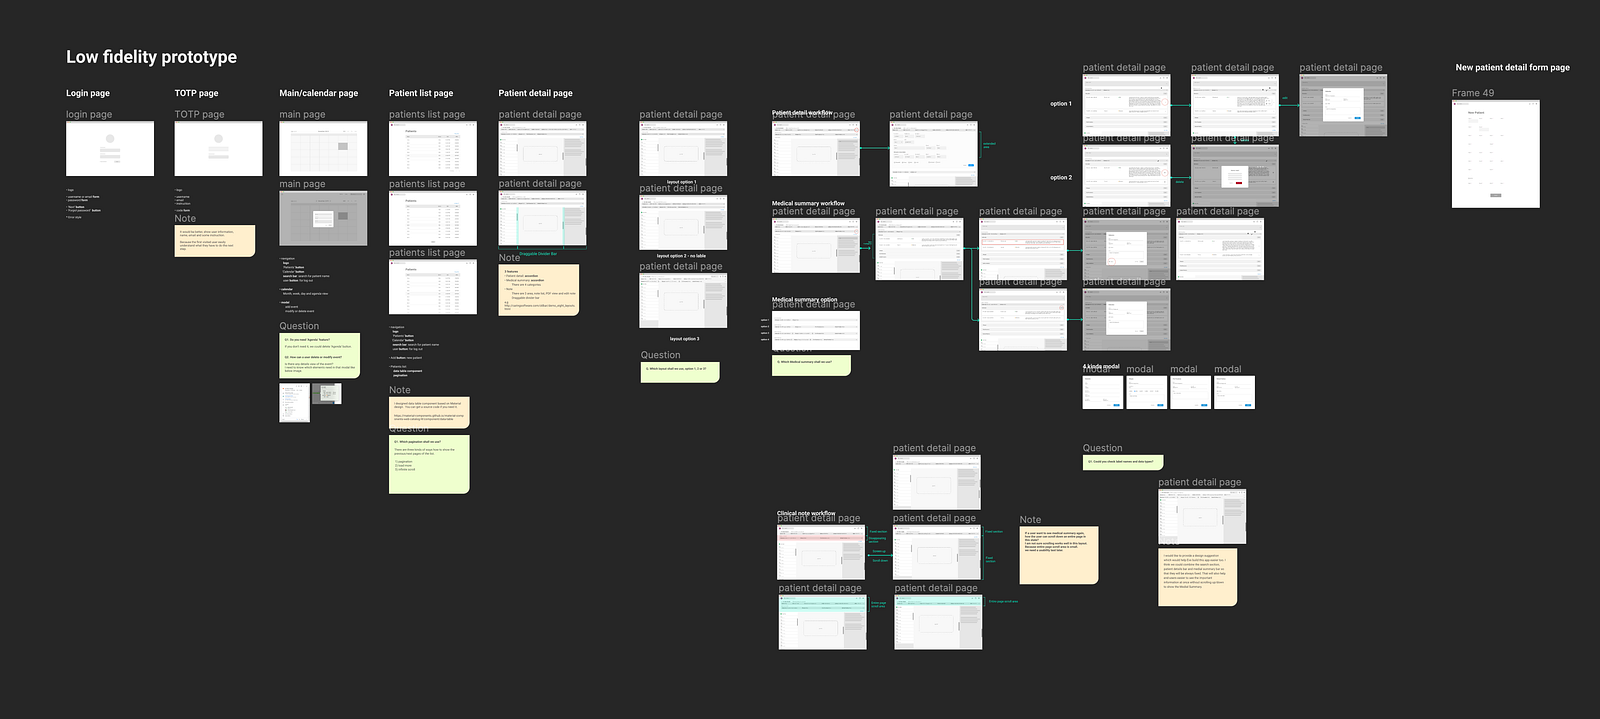
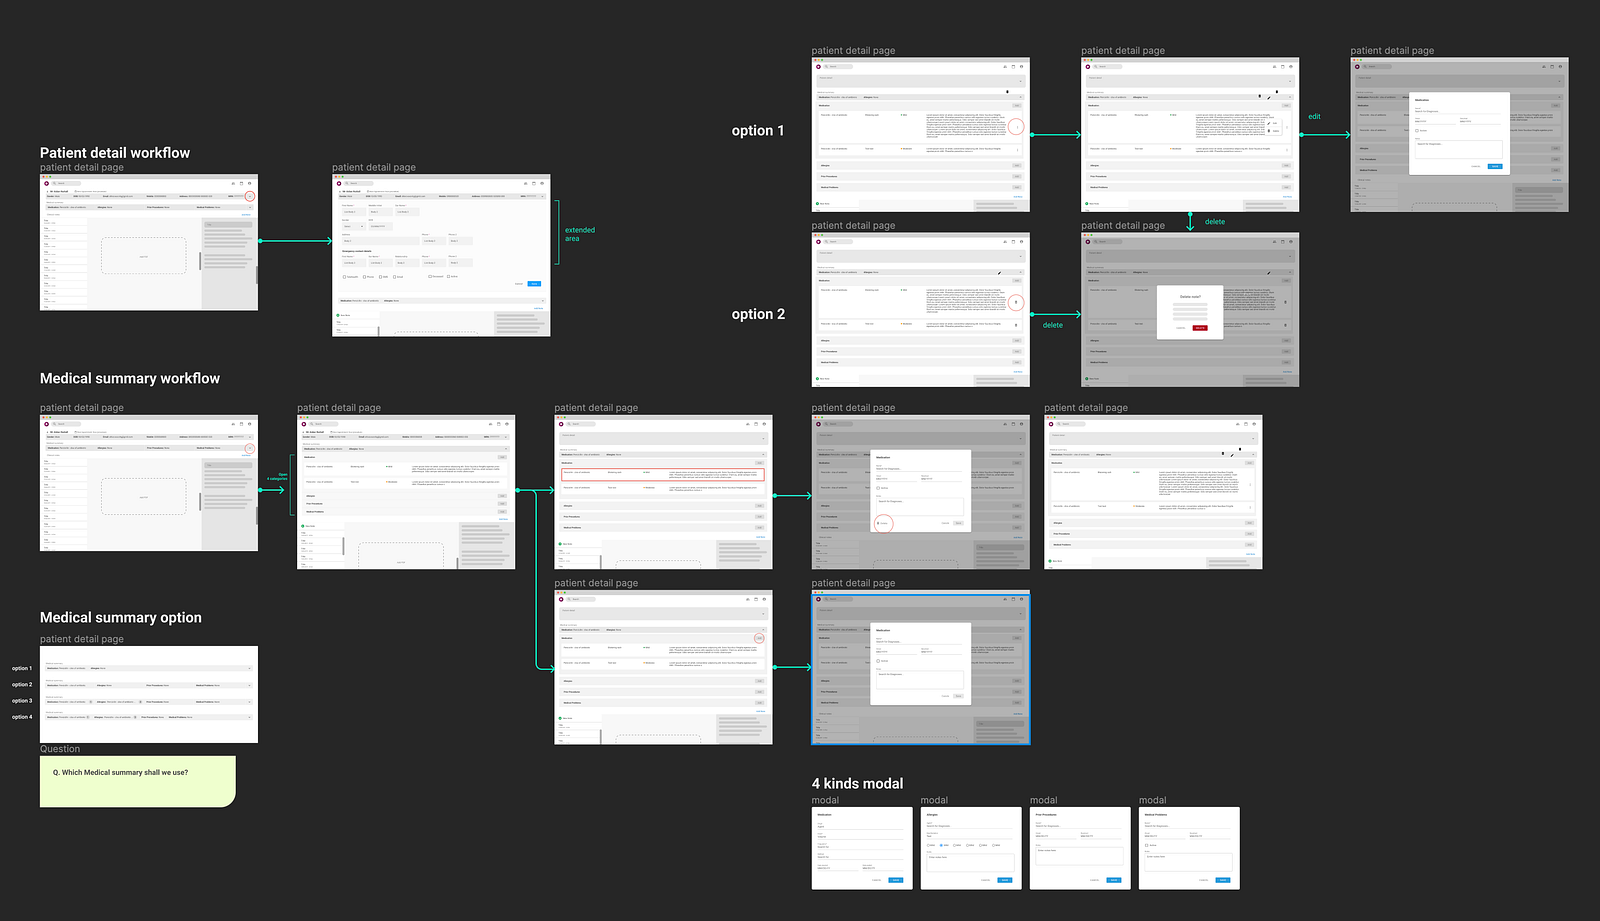
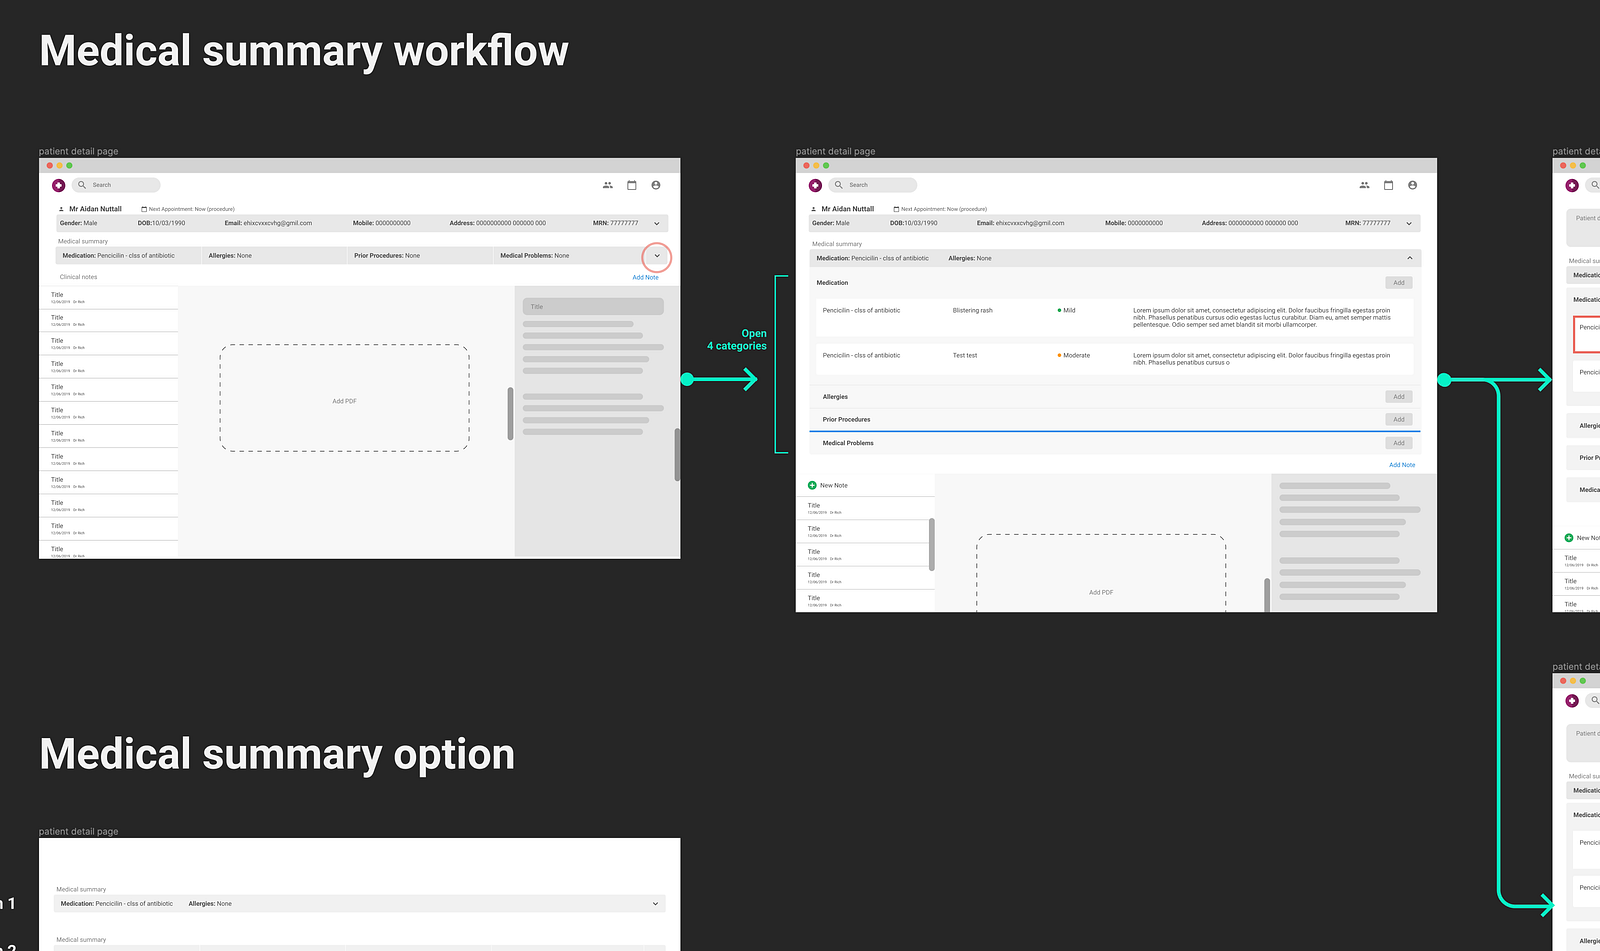
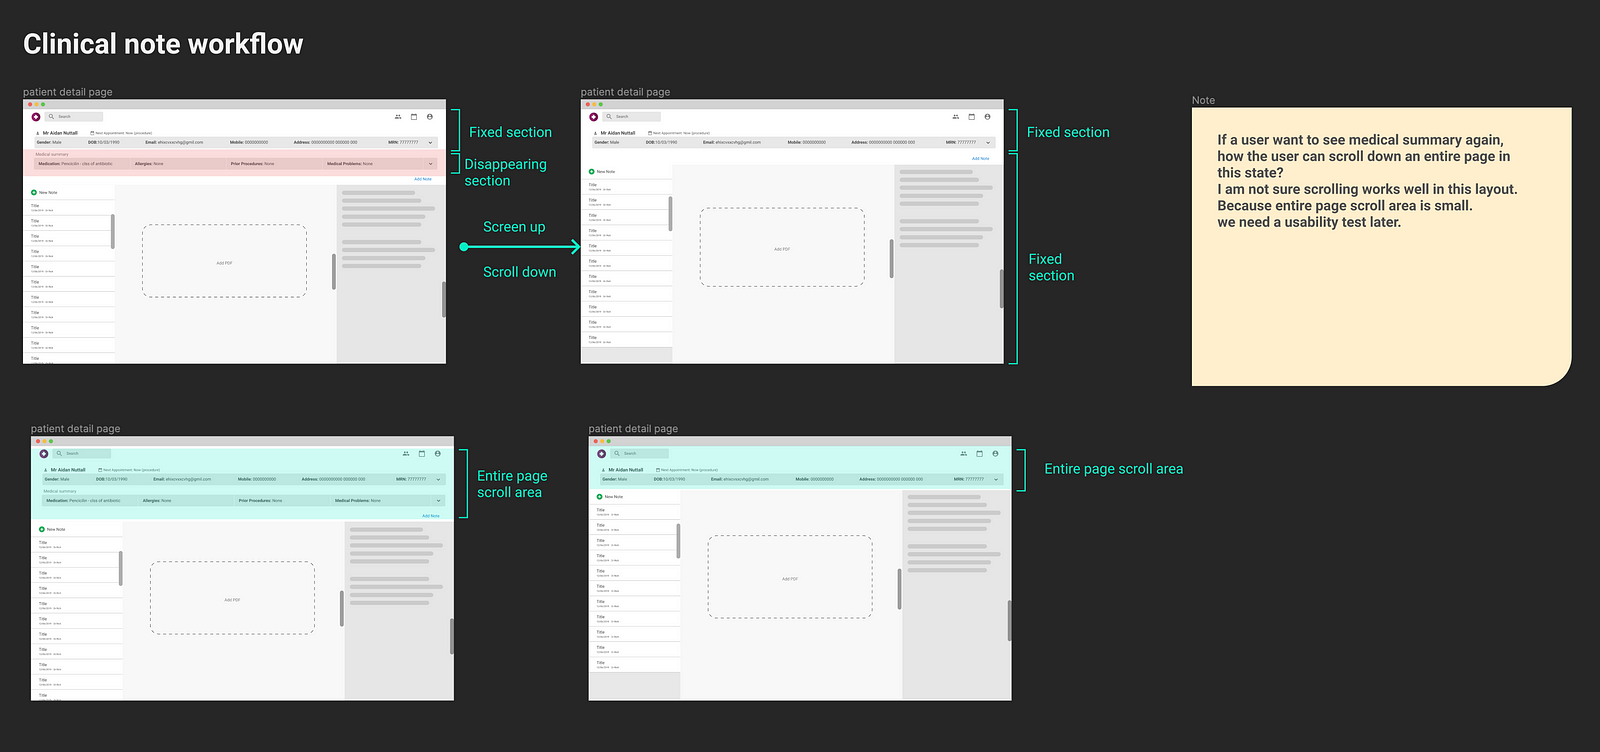
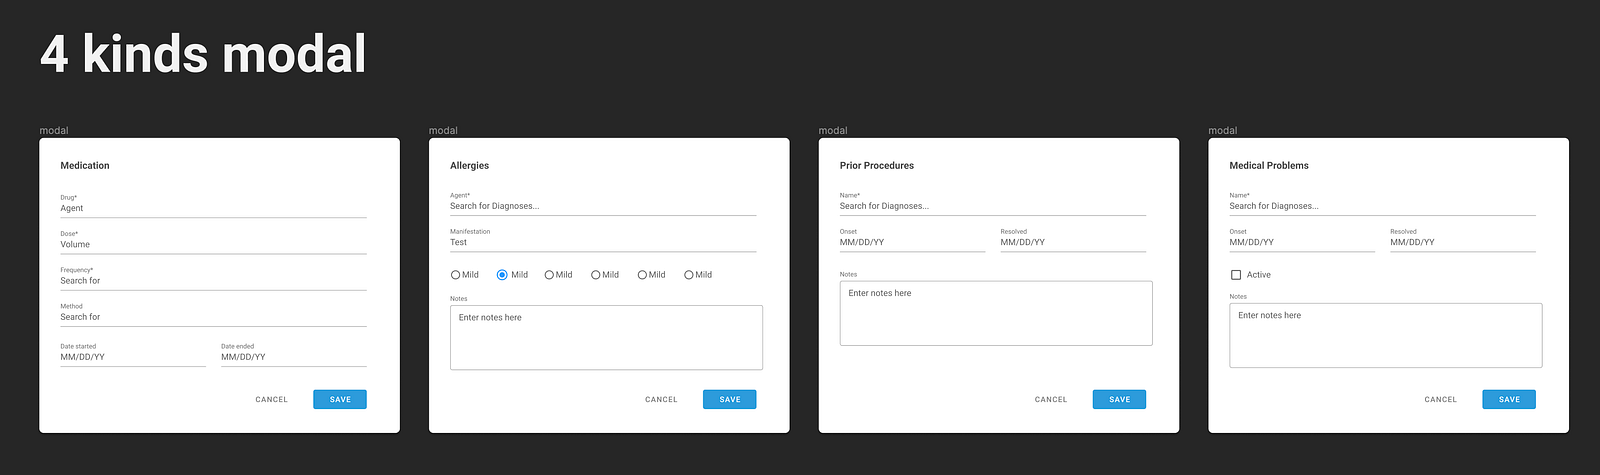

Focused:
- • User (Docter) workflow
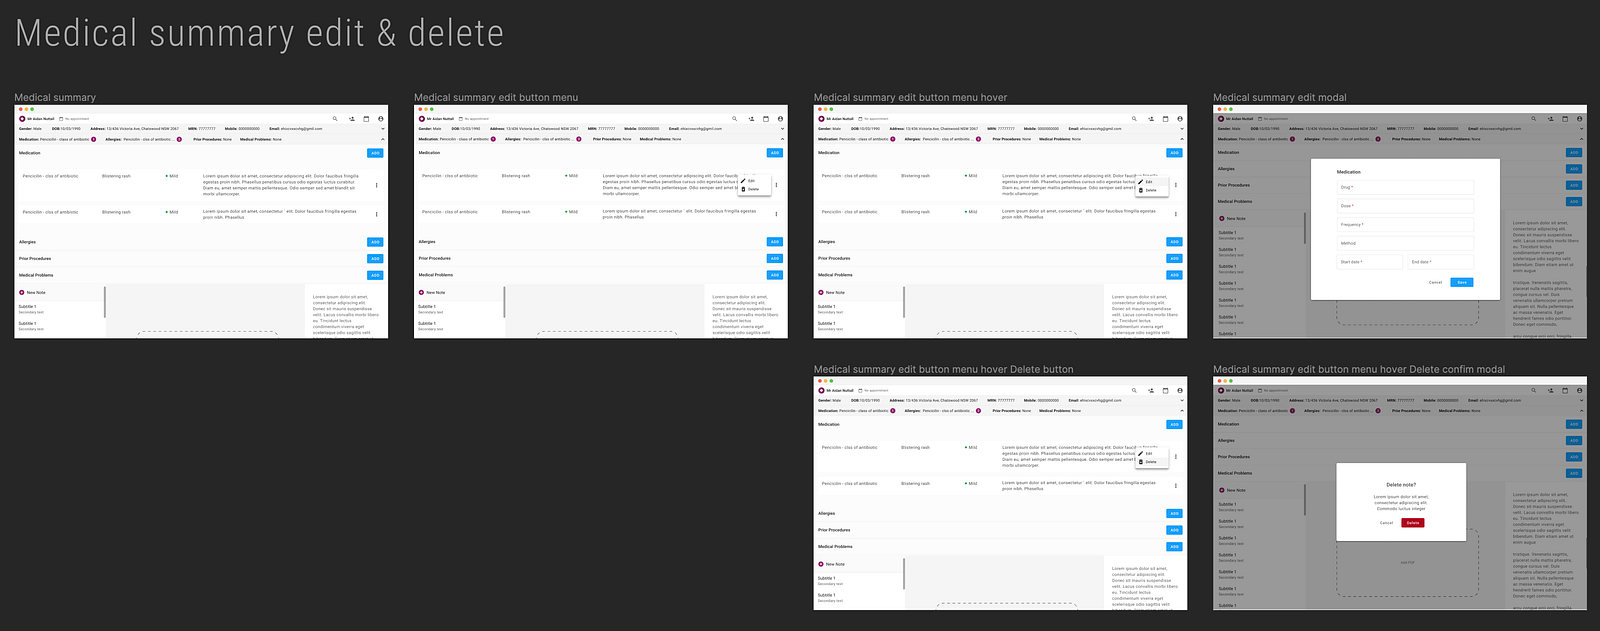
- • Features for medical documents: calendar, schedule, note, search, flexible note screen for PDF, list, information detail view, etc.
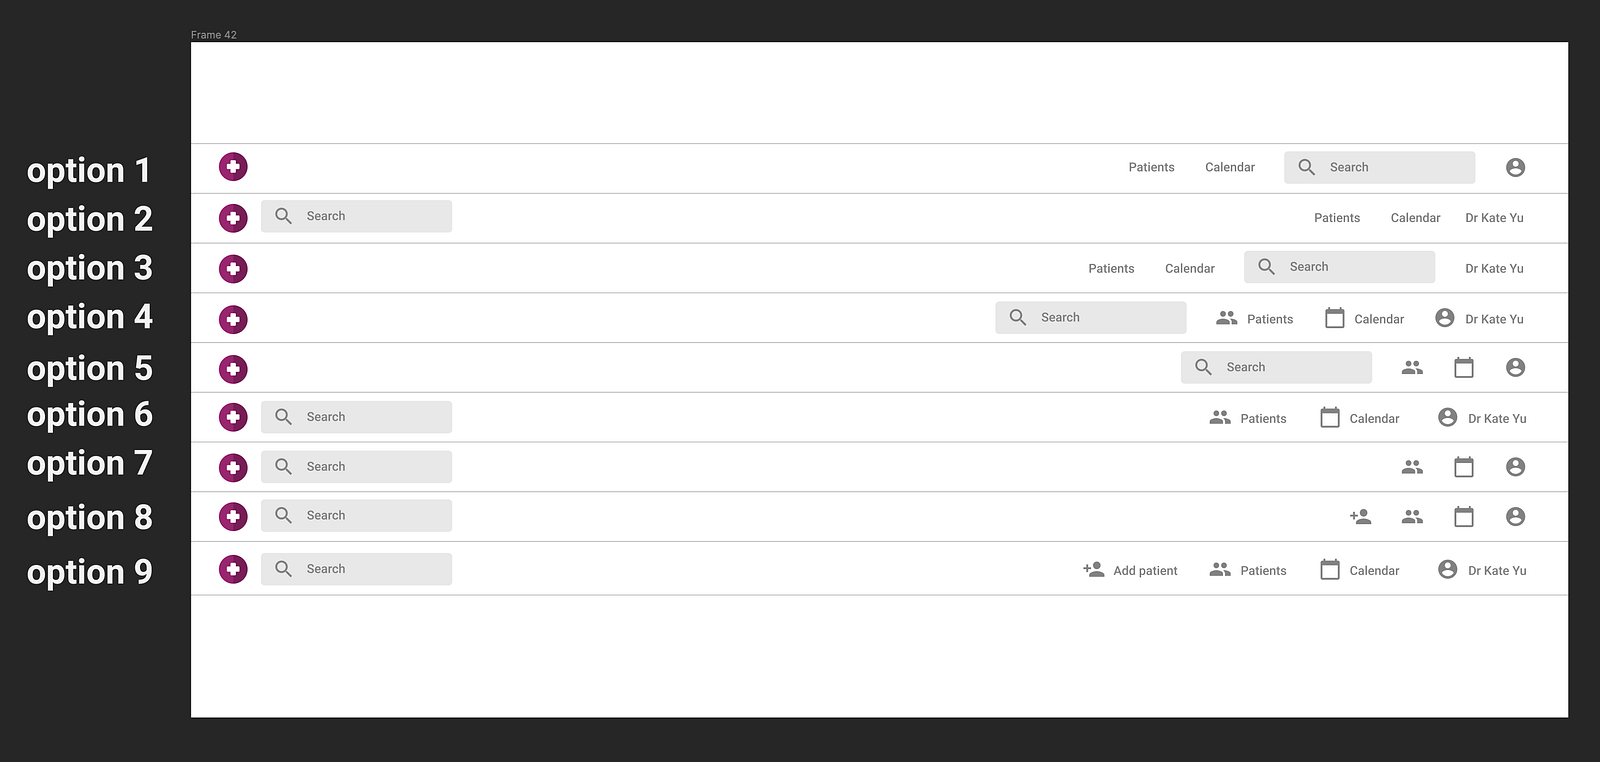
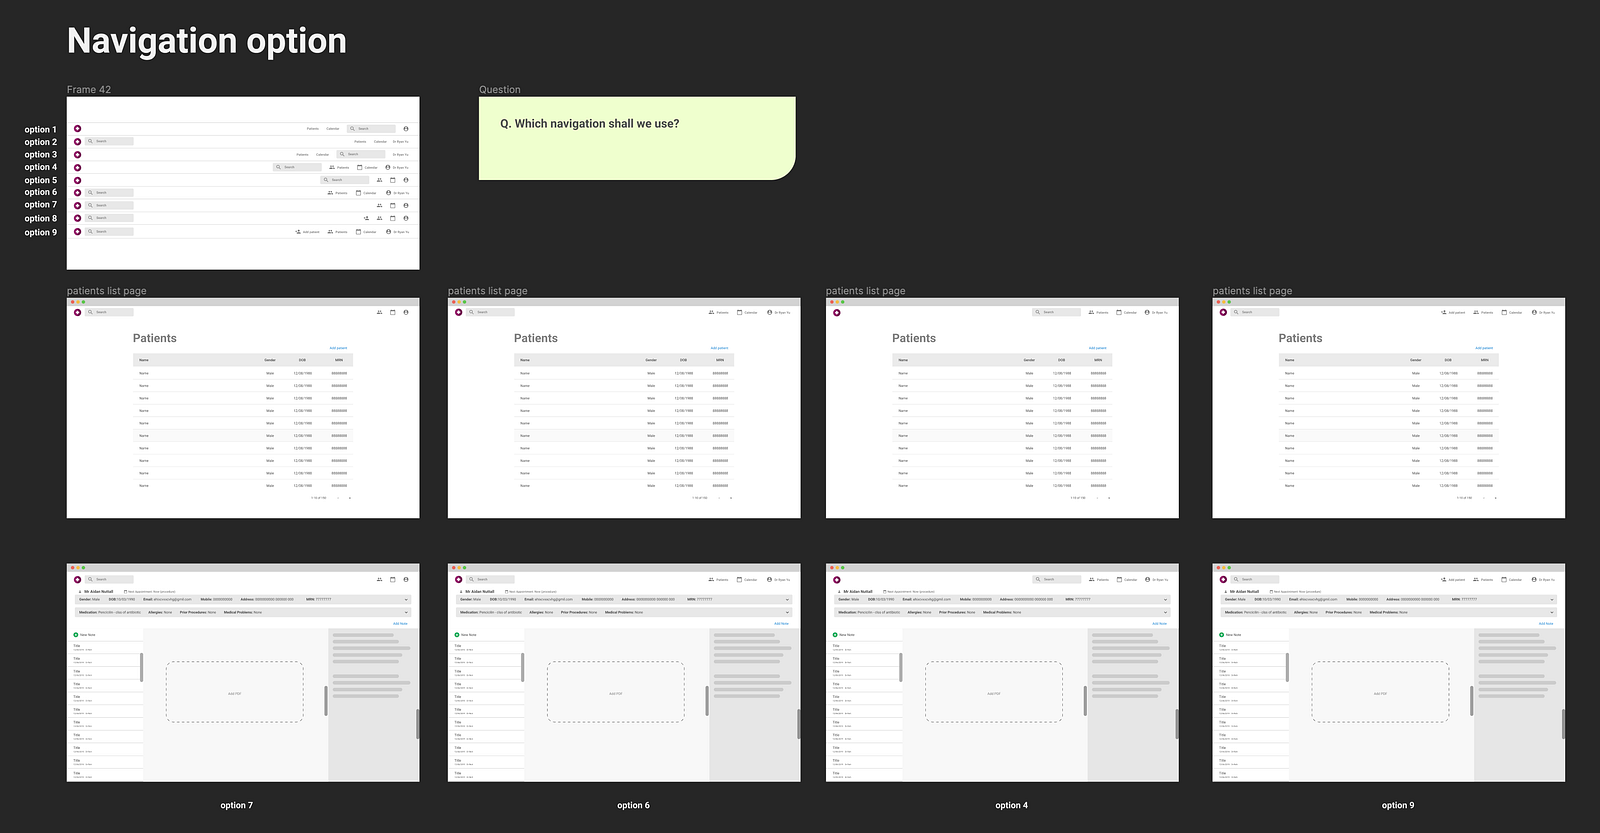
Step 4. High-fidelity prototype & Design Style Guide
Based on the client’s feedback, I designed a high-fidelity prototype as well as documenting the design style guide.

Focused:
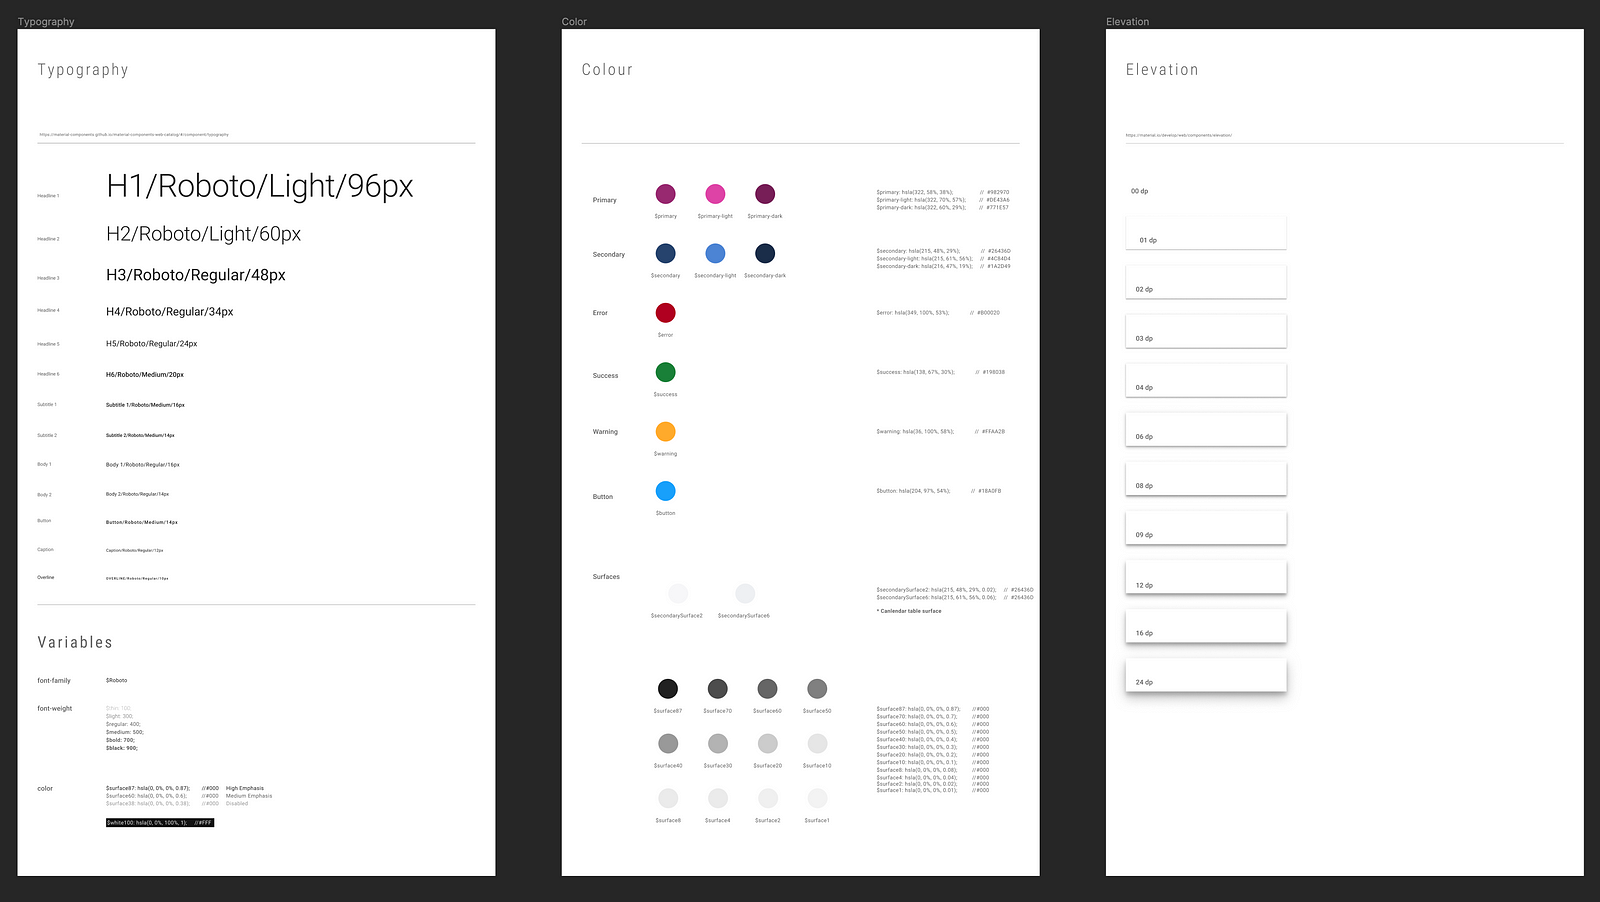
- • Brand identity such as colour, font family, tone and manner
- • Legibility for finding information easily
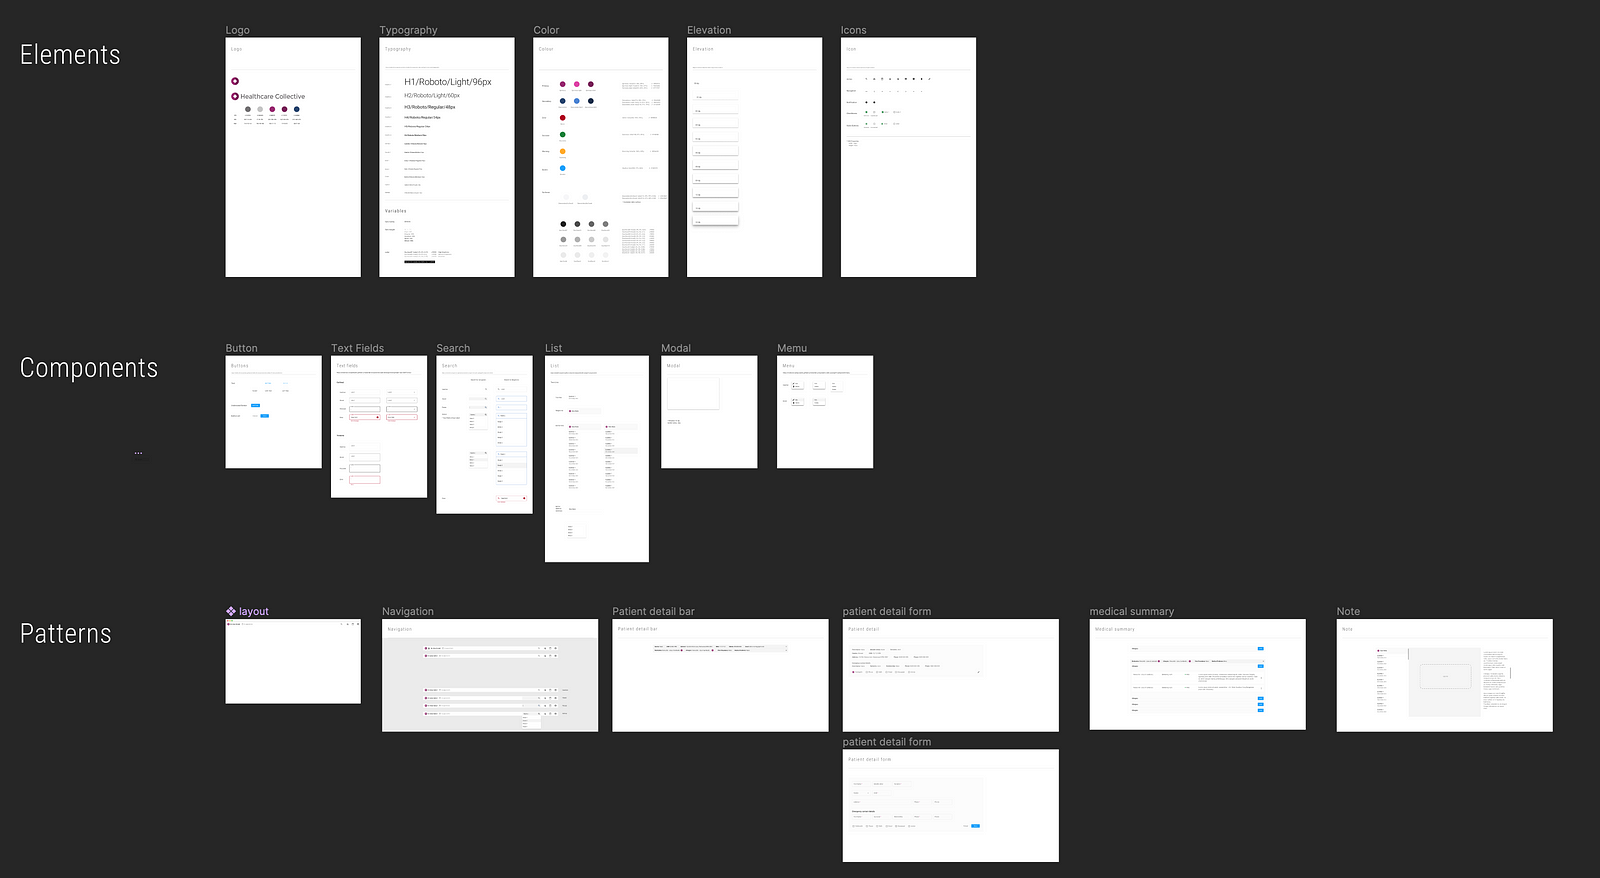
Design style guide
I classified a design style guide into three main categories such as elements, components and patterns.


Wrap up
It was a short 5 days product design process but gave me a great opportunity to provide a lot of different perspectives. This project was a bit different from other website designs as I had to focus more on effectively presenting the data through different components and patterns.
Due to the short timeframe, I couldn’t spend more time on the user test and QA for this project. This is something I want to learn and experience more from future projects.
If you want to know more about this project, leave me a comment, Twitter or Linkedin. Please stay tuned (👏) if you liked it. 🤩
🙏 Thank you so much for taking the time to read this case study.


